2. Configuration

The following pages provide guidance on the initial setup and how administration and granular role assignment are achieved.
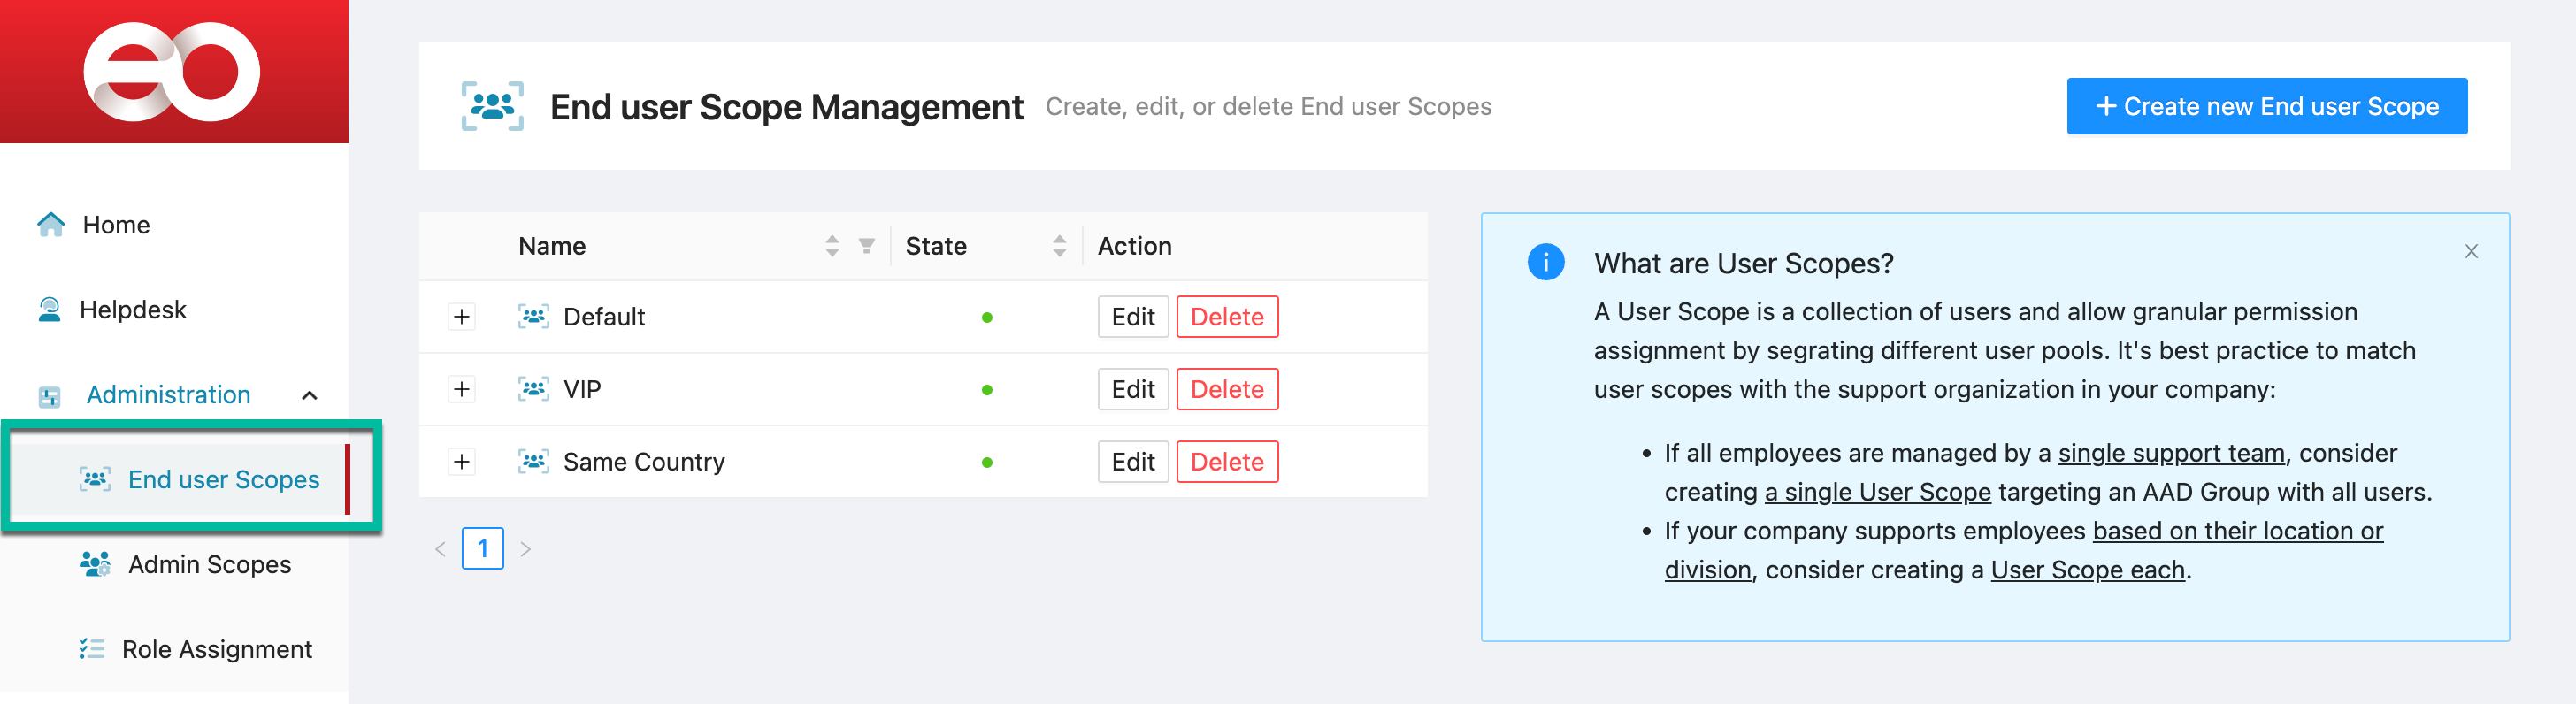
End User Scopes

An End User Scope is a collection of users that allows EndpointOps the assignment of granular permissions by segregating different user pools. It's best practice to match end user scopes with the support organization set up of your company. E.g.:

Required Permissions

End User Scopes are created and managed by EndpointOps Administrators.

image.png

Types of End User Scopes

EndpointOps supports different types of End User Scopes to support a wide range of setups.

image.png

Type: User group membership

A simple way to set up End User Scopes is relying on an account's membership to an AAD Group, Administrative Unit(AU), or Global Azure Role. When selecting multiple AAD Groups/AUs, the membership of any AAD Group/AU will assign the user to the respective End User Scope.

image.png

  1. Type the name of an AAD Group, Administrative Unit, or Global Azure Role

  2. Select an entry from the list

  3. Selected objects will appear on the right side. Undo the selection with the Remove Button

Type: User/Admin matching attribute

This option is recommended to set up country-, site-, or division-based End User Scope. 

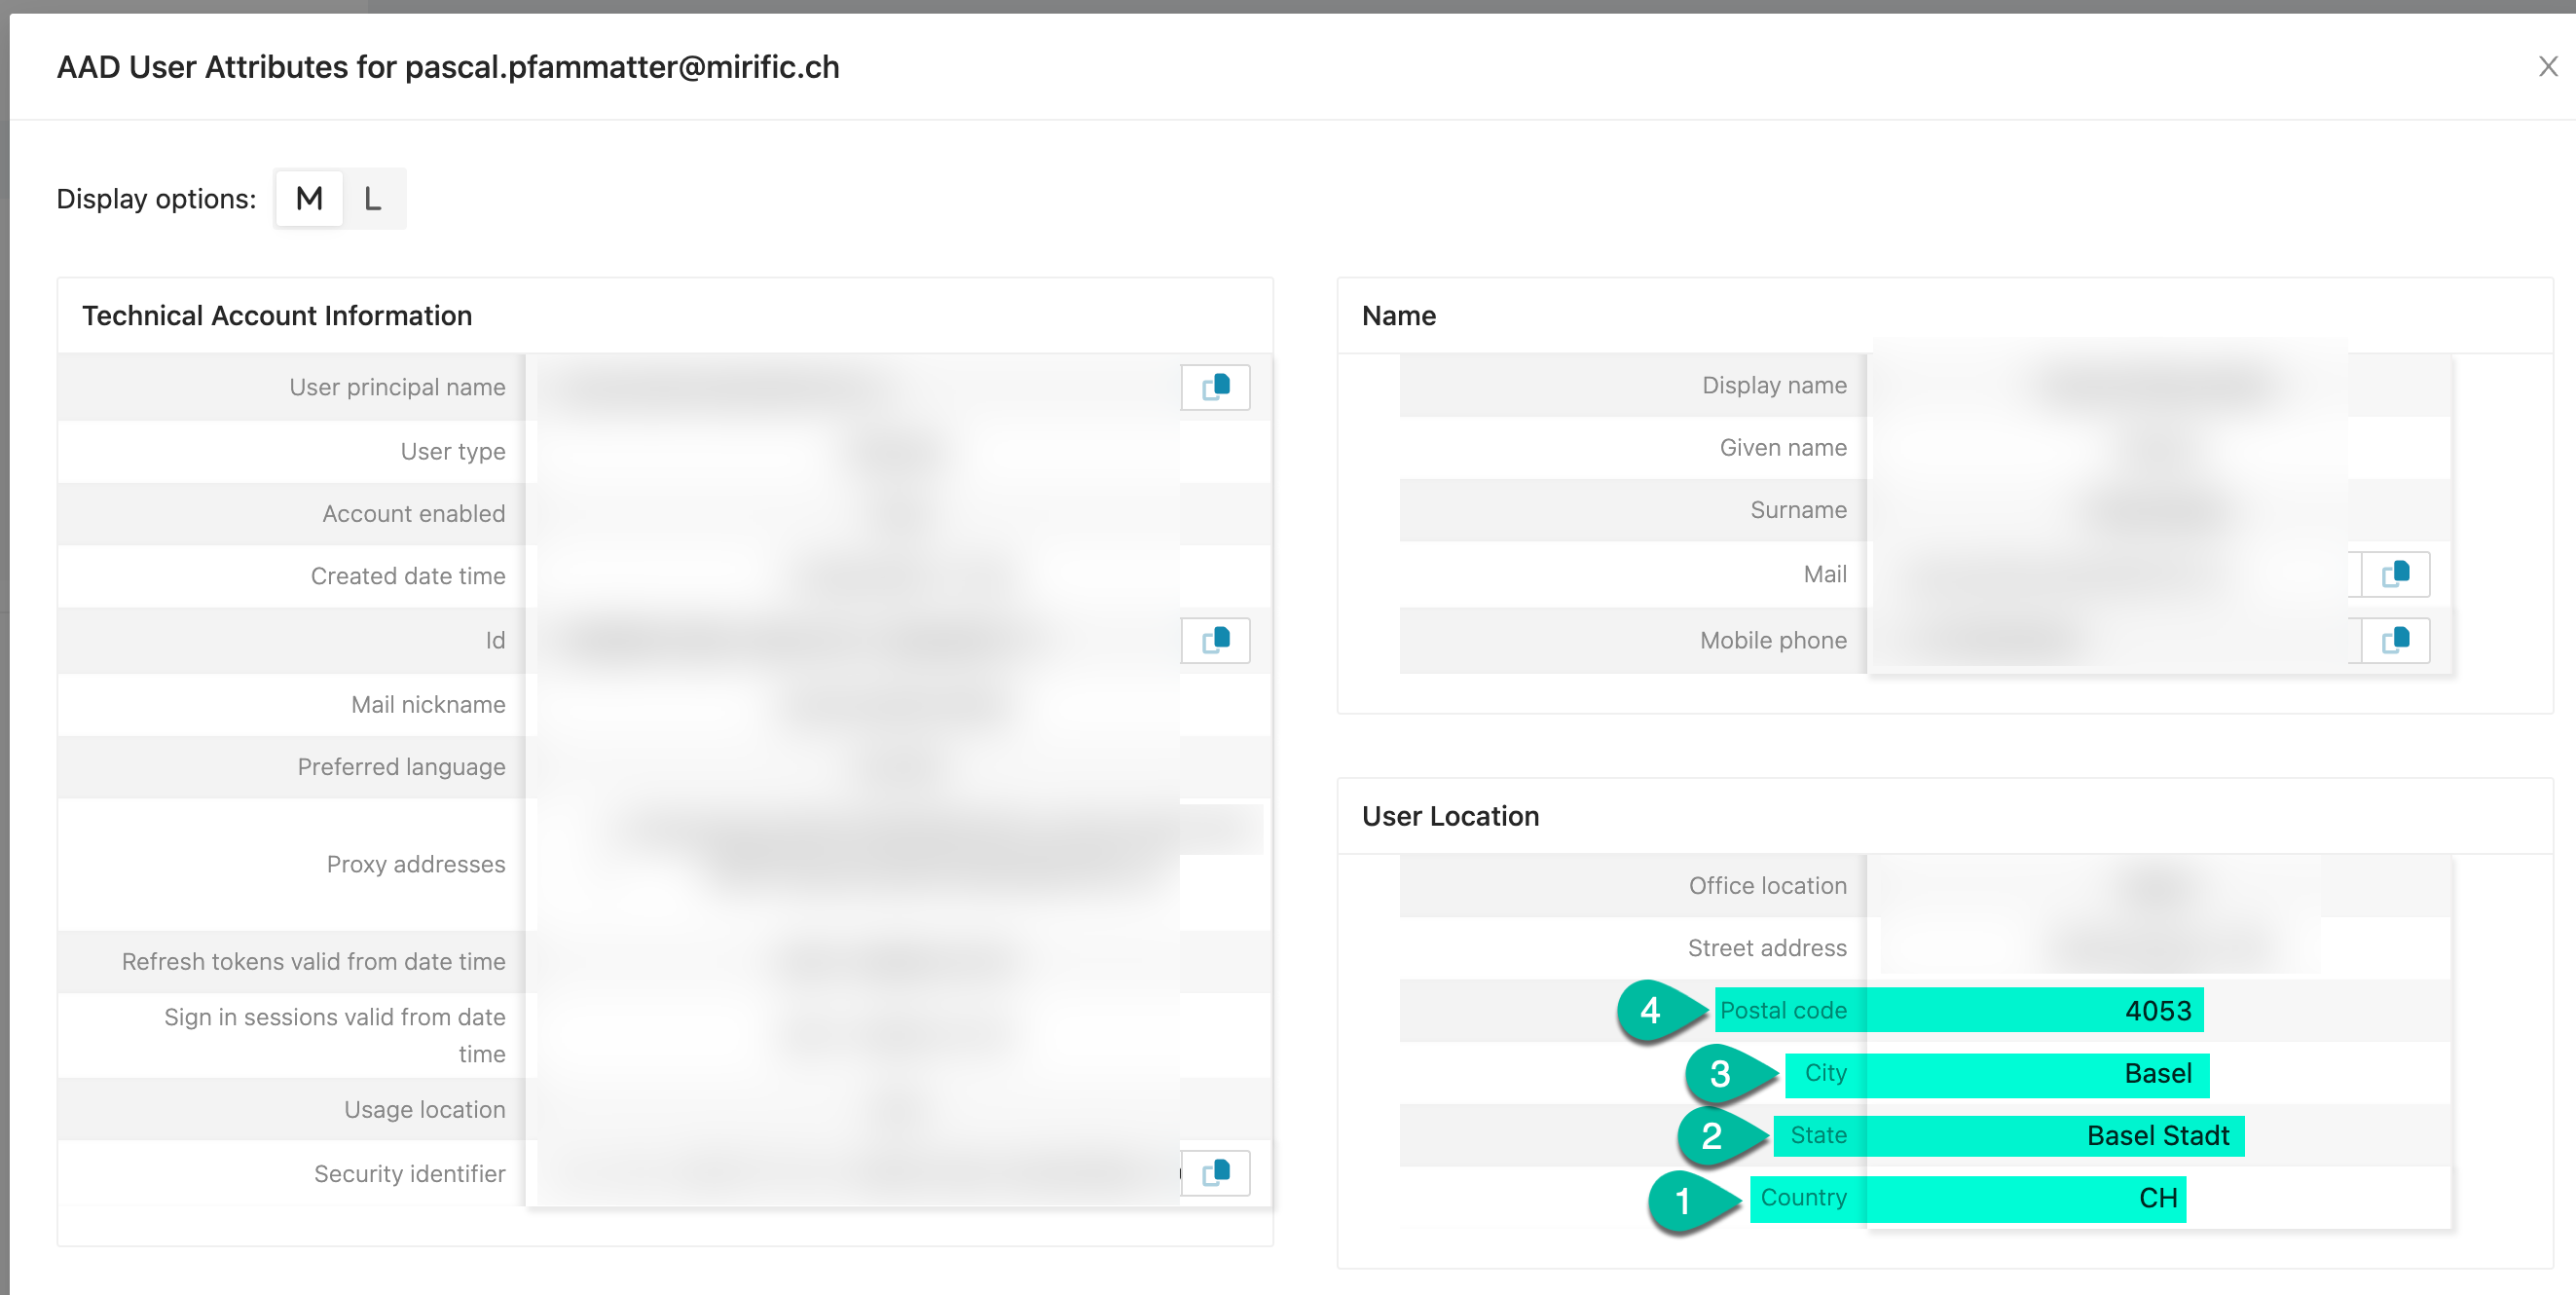
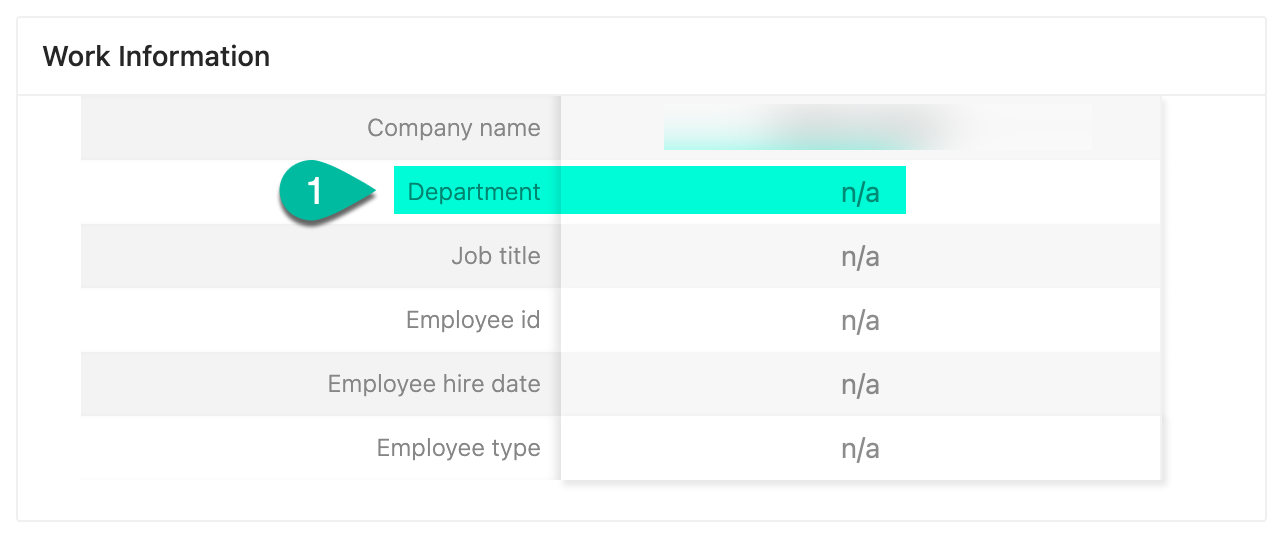
Instead of manually creating an AAD Group, a single "User/Admin matching attribute"-End User Scope can be created. Such an End User Scope with the configuration of "Country" will dynamically assign the End User Scope to a user if the Helpdesk supporter's country property matches the end user's country property. Supported properties are Department, Country, State, City, and Postal code.

The Azure Active Directory Account properties are used for this assignment:

2023-10-30_14-26-44.png

On EndpointOps: Helpdesk> Search for a user > AAD Account Information:

image.png

2023-10-30_14-35-02.png

On the Azure Portal:

2023-10-30_14-24-39.png

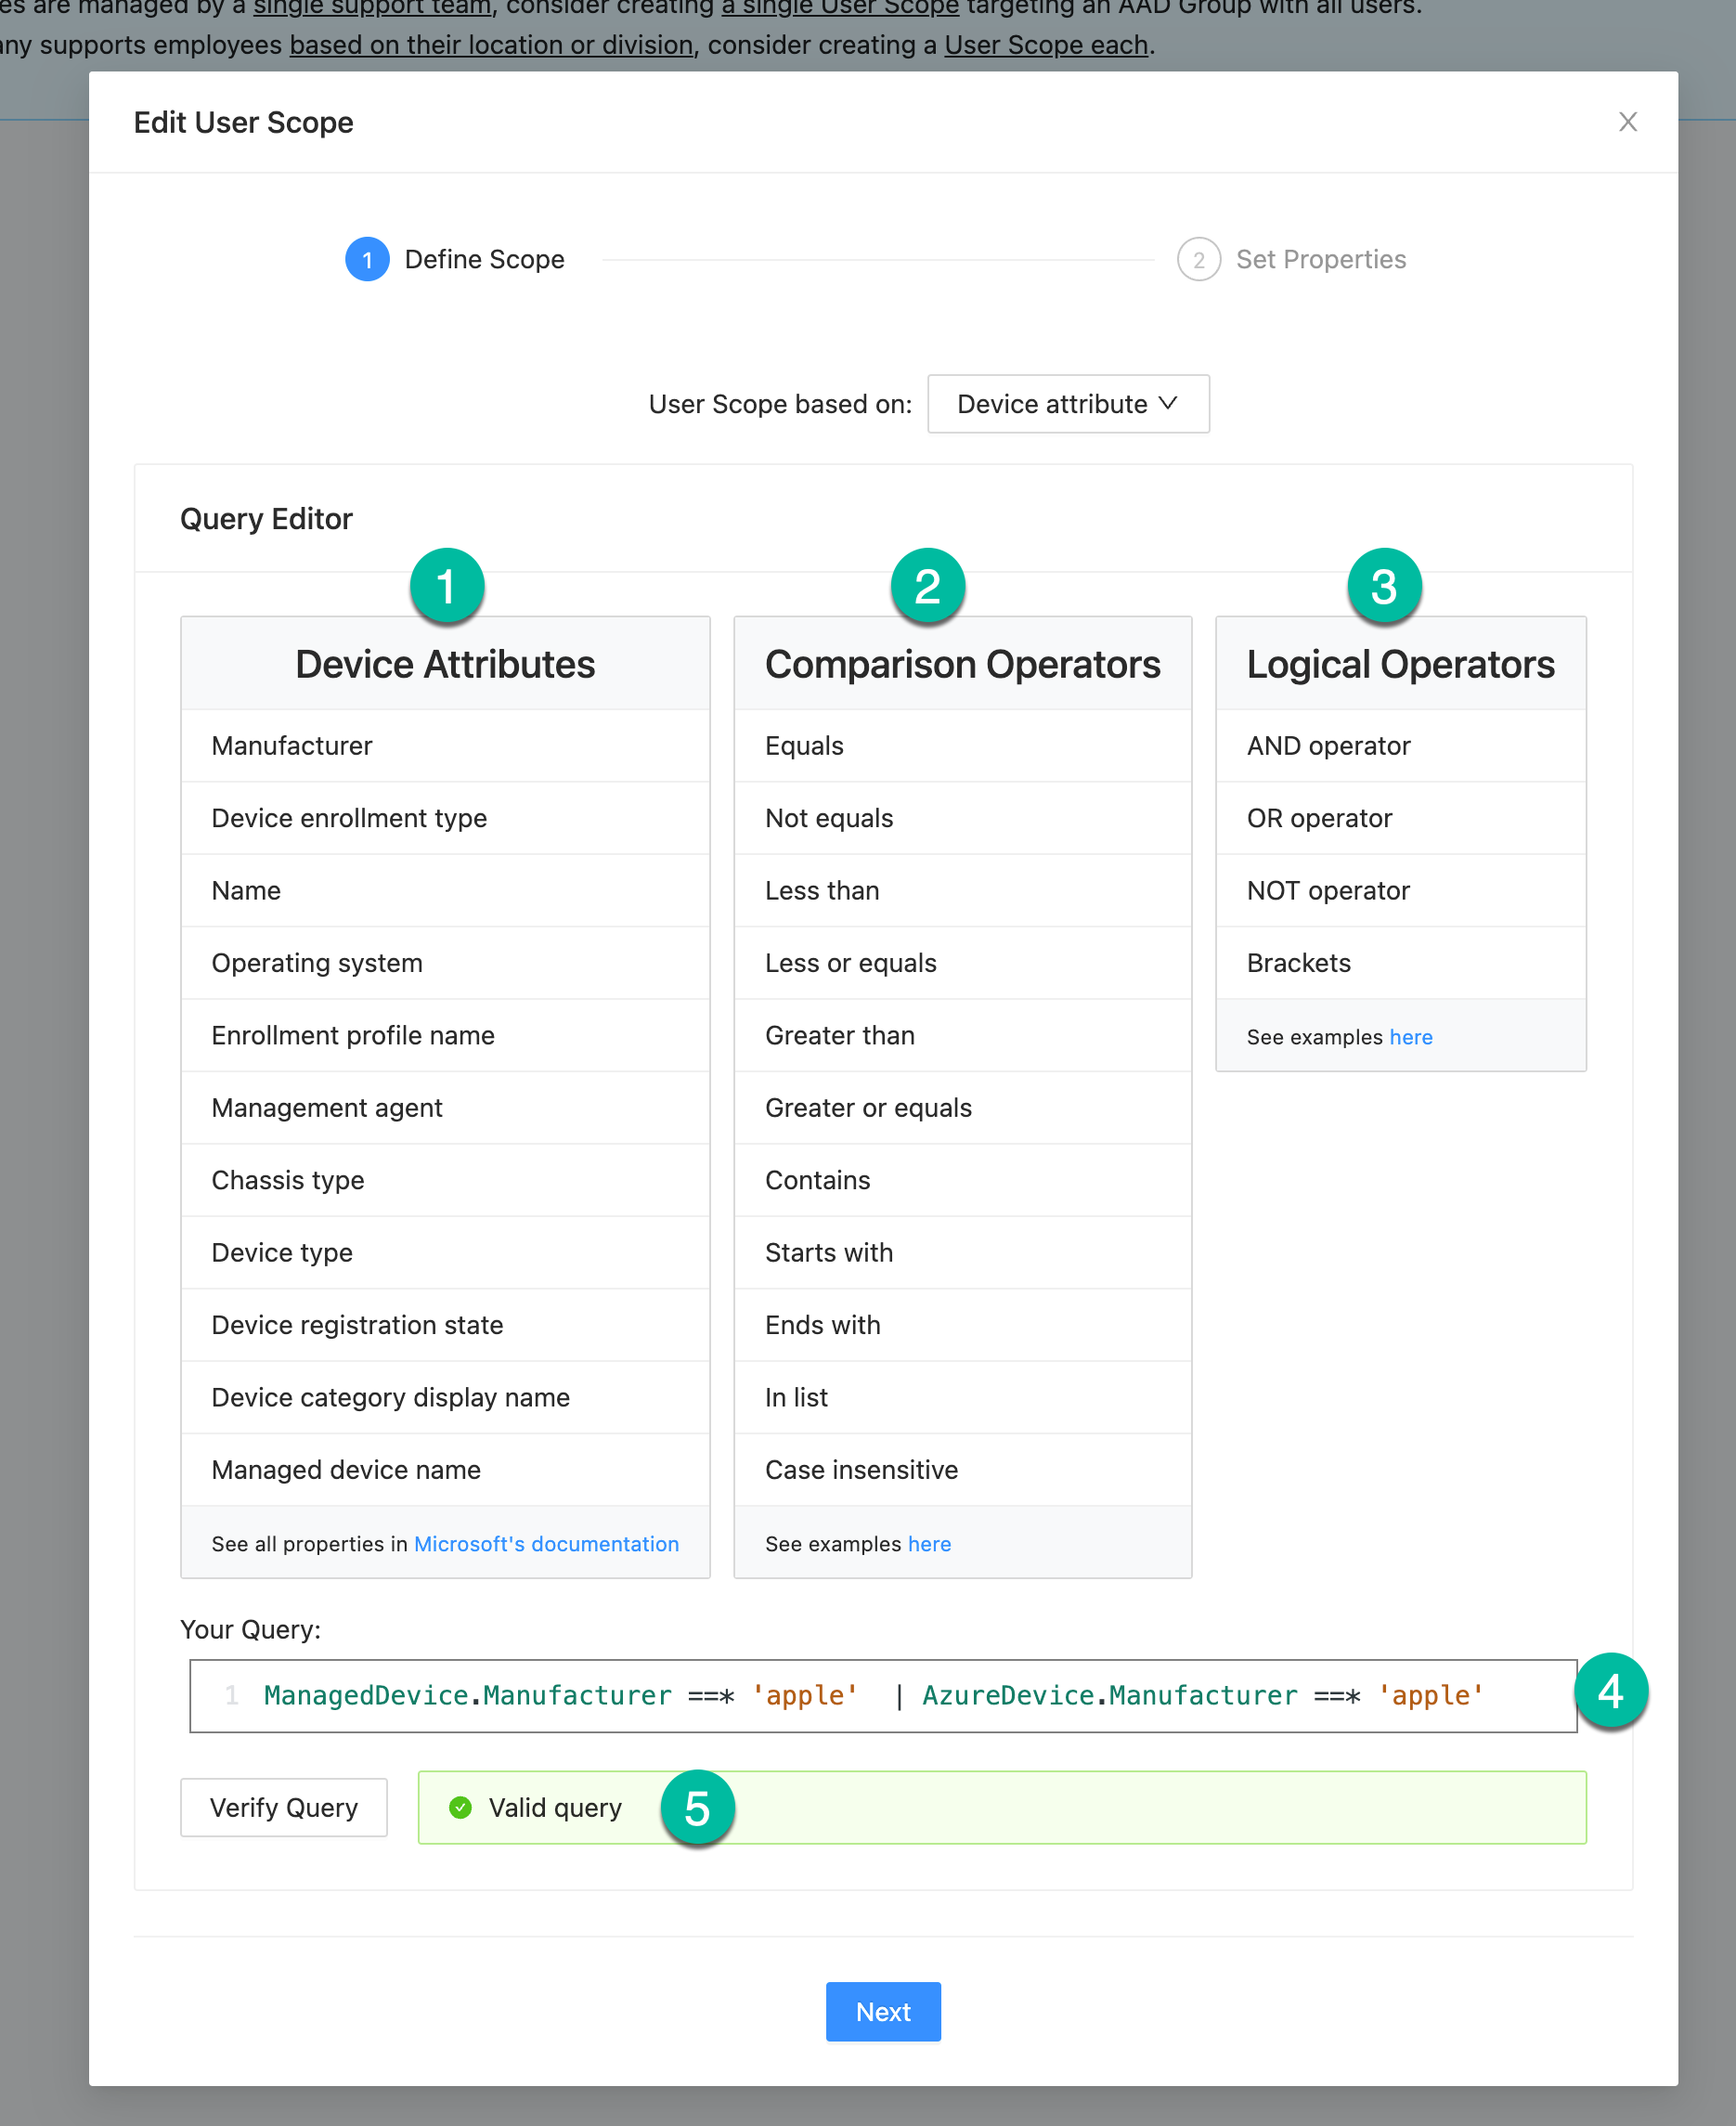
Type: Device Attribute

This option is recommended to set up to assign an End User Scope to user-less devices.

When selecting this type, a Query editor will appear.

image.png

  1.  Select one of the device attributes you want to test against. All Intune-device attributes are available from the ManagedDevice object, and all Azure-device attributes from the AzureDevice attribute. Review the examples for additional guidance. Note the URL at the end of the list for all available attributes.
  2. Select the desired Comparison Operator to complete your query. Note that you can make your query case insensitive by adding an *  character after the operator (eg. attribute == 'sOmE vAlUe')
  3. You can combine multiple verifications with a logical operator
  4. Double-check or complete your query.
  5. Verify the validity of your query or review the errors that appear.

Once valid, you can proceed with the Next button

Type: User Attribute

Special use cases may require you to create a user attribute query. When selecting this type, a Query editor will appear.

image.png

  1.  Select one of the user attributes you want to test against. Review the examples for additional guidance. Note the URL at the end of the list for all available attributes.
  2. Select the desired Comparison Operator to complete your query. Note that you can make your query case insensitive by adding an * character after the operator (eg. attribute == 'sOmE vAlUe')
  3. You can combine multiple verifications with a logical operator
  4. Double-check or complete your query.
  5. Verify the validity of your query or review the errors that appear.

Once valid, you can proceed with the Next button

End User Scope Properties

The second step of any type of End User Scope allows you to set the properties. 

image.png
  1. The name of the End User Scope is visible to Helpdesk operators when searching for a user or device. Choose a unique and self explanatory name.
  2. Users and devices might be members of multiple End User Scopes. If the Priority of a user's or device's End User Scope is elevated, the user will only be part of the End User Scopes with the highest priority. Following this logic you can achieve exclusions for special cases. Imagine an End User Scope matching all users with the name "Default" and priority of 0, and second End User Scope called "VIP users" for a subset of users with a priority of 1 and higher. If a user is associated with the End User Scope "VIP users", they will no longer be member of the "Default" End User scope due to the elevated priority of the "VIP users" End User Scope. Depending on your use case this will allow you to assign different set of permissions to the admin scopes (this could be more permissions, less permissions, or grant specific access to another Admin scope)
  3. Enabled End User Scopes will be used in Endpoint Ops, whereas Disabled End User Scopes are omitted.
  4. Proceed with the Next button to Save your End User Scope.

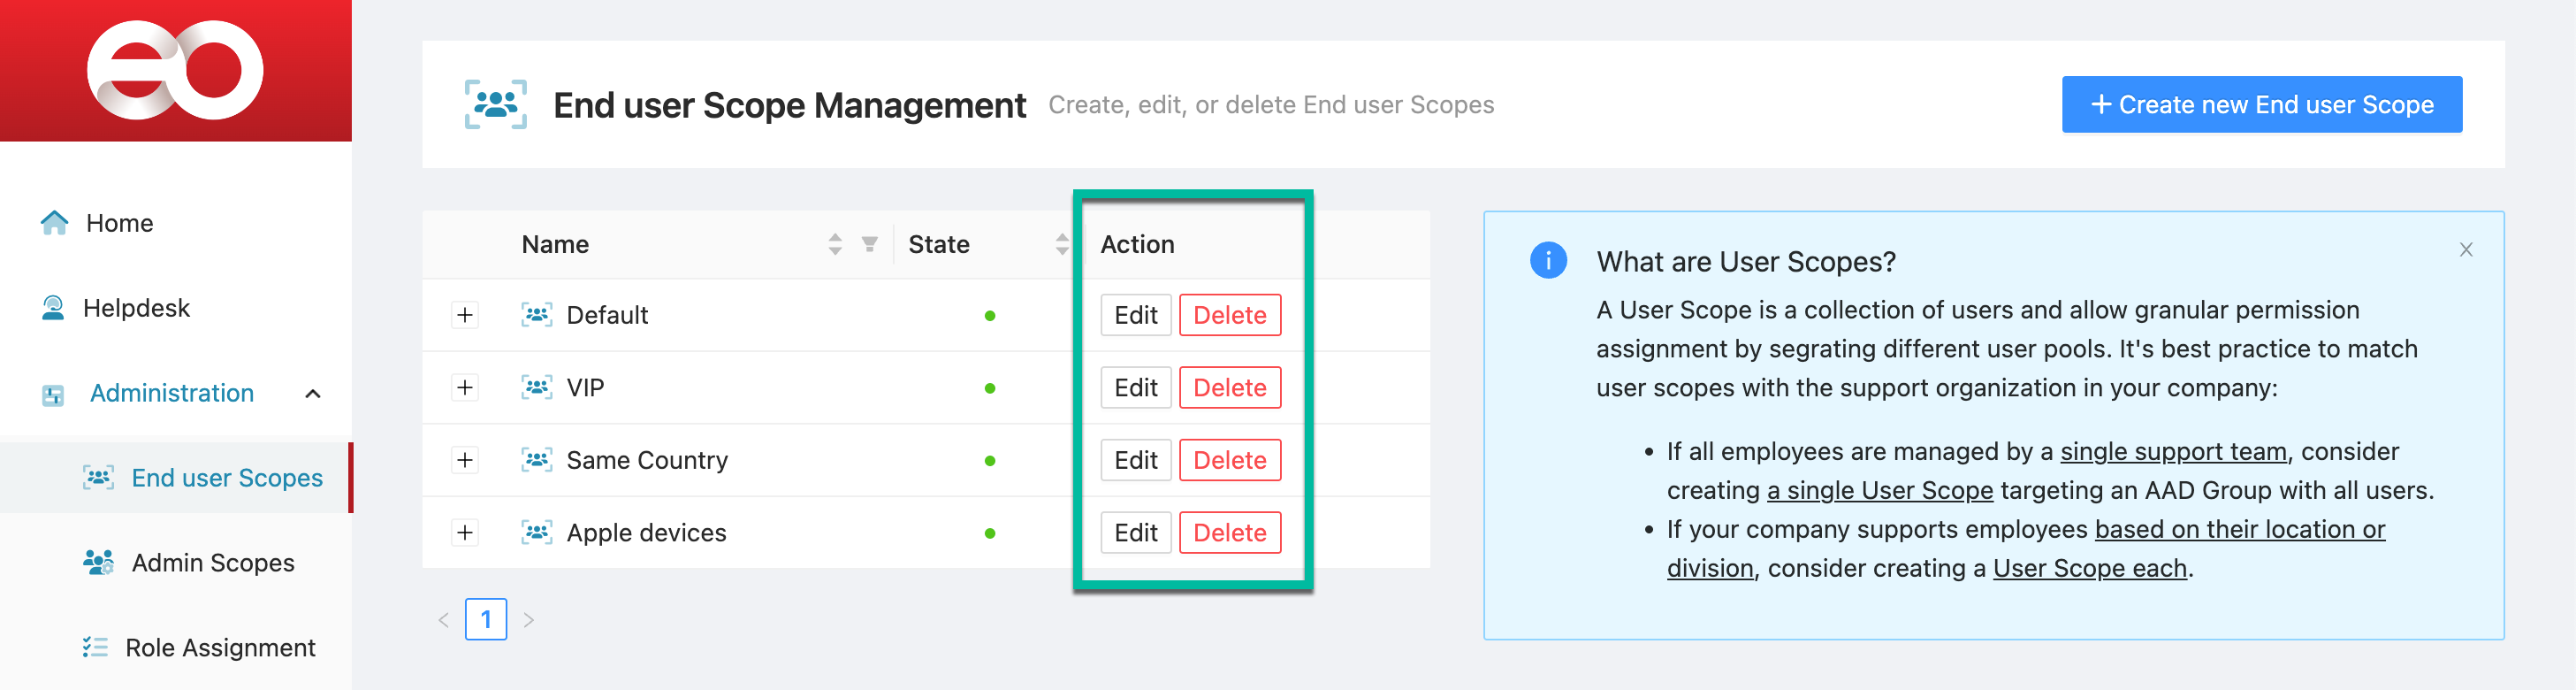
Edit or delete End User Scopes

End User Scopes can be updated or deleted at any point. Simply use the Edit or Delete button on the respective End User Scope.

image.png

Admin Scopes

An Admin Scope is a collection of administrators and allows granular permission assignment by segregating different user and admin pools. It's best practice to match admin groups with the support organization in your company:

Required Permissions

Admin Scopes are created and managed by EndpointOps Administrators.

image.png

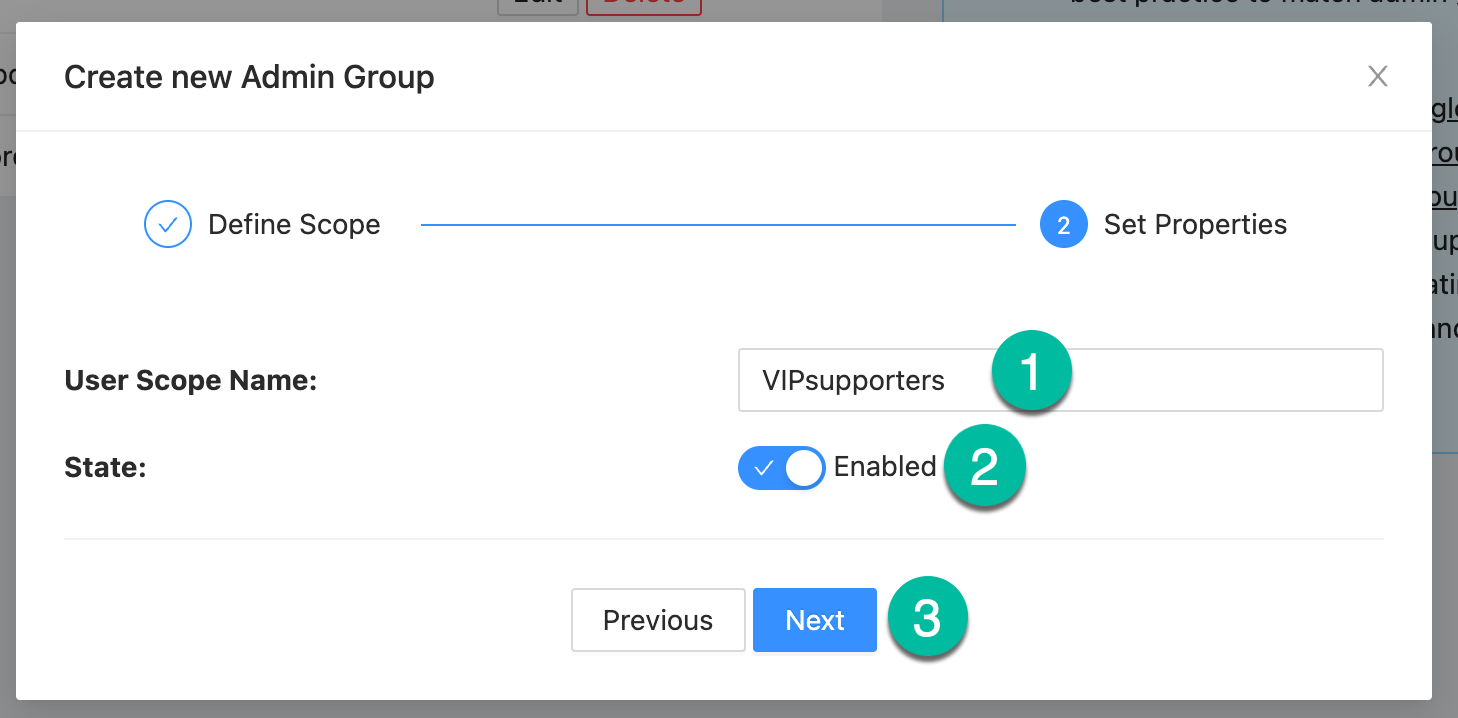
Admin Scope Creation

Admin Scopes follow a similar principle to the End User Scopes, but they only support User group membership assignments. 

image.png

To create a new Admin Scope:

  1. Click on Create new Admin Scope
  2. Type the name of an AAD Group, Administrative Unit, or Global Azure Role. The membership of one of the groups is sufficient to become associated with an Admin Scope.
  3. Select an entry from the list
  4. Selected objects will appear on the right side. Undo the selection with the Remove Button
  5. Use the Next button to proceed with the second step.

image.png

  1. The name of the Admin Scope is visible to Helpdesk operators in the My Access
  2. Enabled Admin Scopes will be used in Endpoint Ops, whereas Disabled Admin Scopes are omitted.
  3. Proceed with the Next button to Save your Admin Scope.

Edit or delete Admin Scopes

Admin Scopes can be updated or deleted at any point. Simply use the Edit or Delete button on the respective Admin Scope.

image.png

Role Assignment

Once End User Scopes and Admin Scopes are configured, you can use these entities to assign permissions and allow Admins to perform activities against users.

Required Permissions

Role Assignments are created and managed by EndpointOps Administrators.

image.png

App role assignments

App roles allow Administrators and Helpdesk operators to access areas within EndpointOps. Granting User & Device Permissions to Helpdesk operators will not have any effect if they don't have the role to access the Helpdesk area.

image.png

  1. Use the Edit button to switch into the editing view

image.png

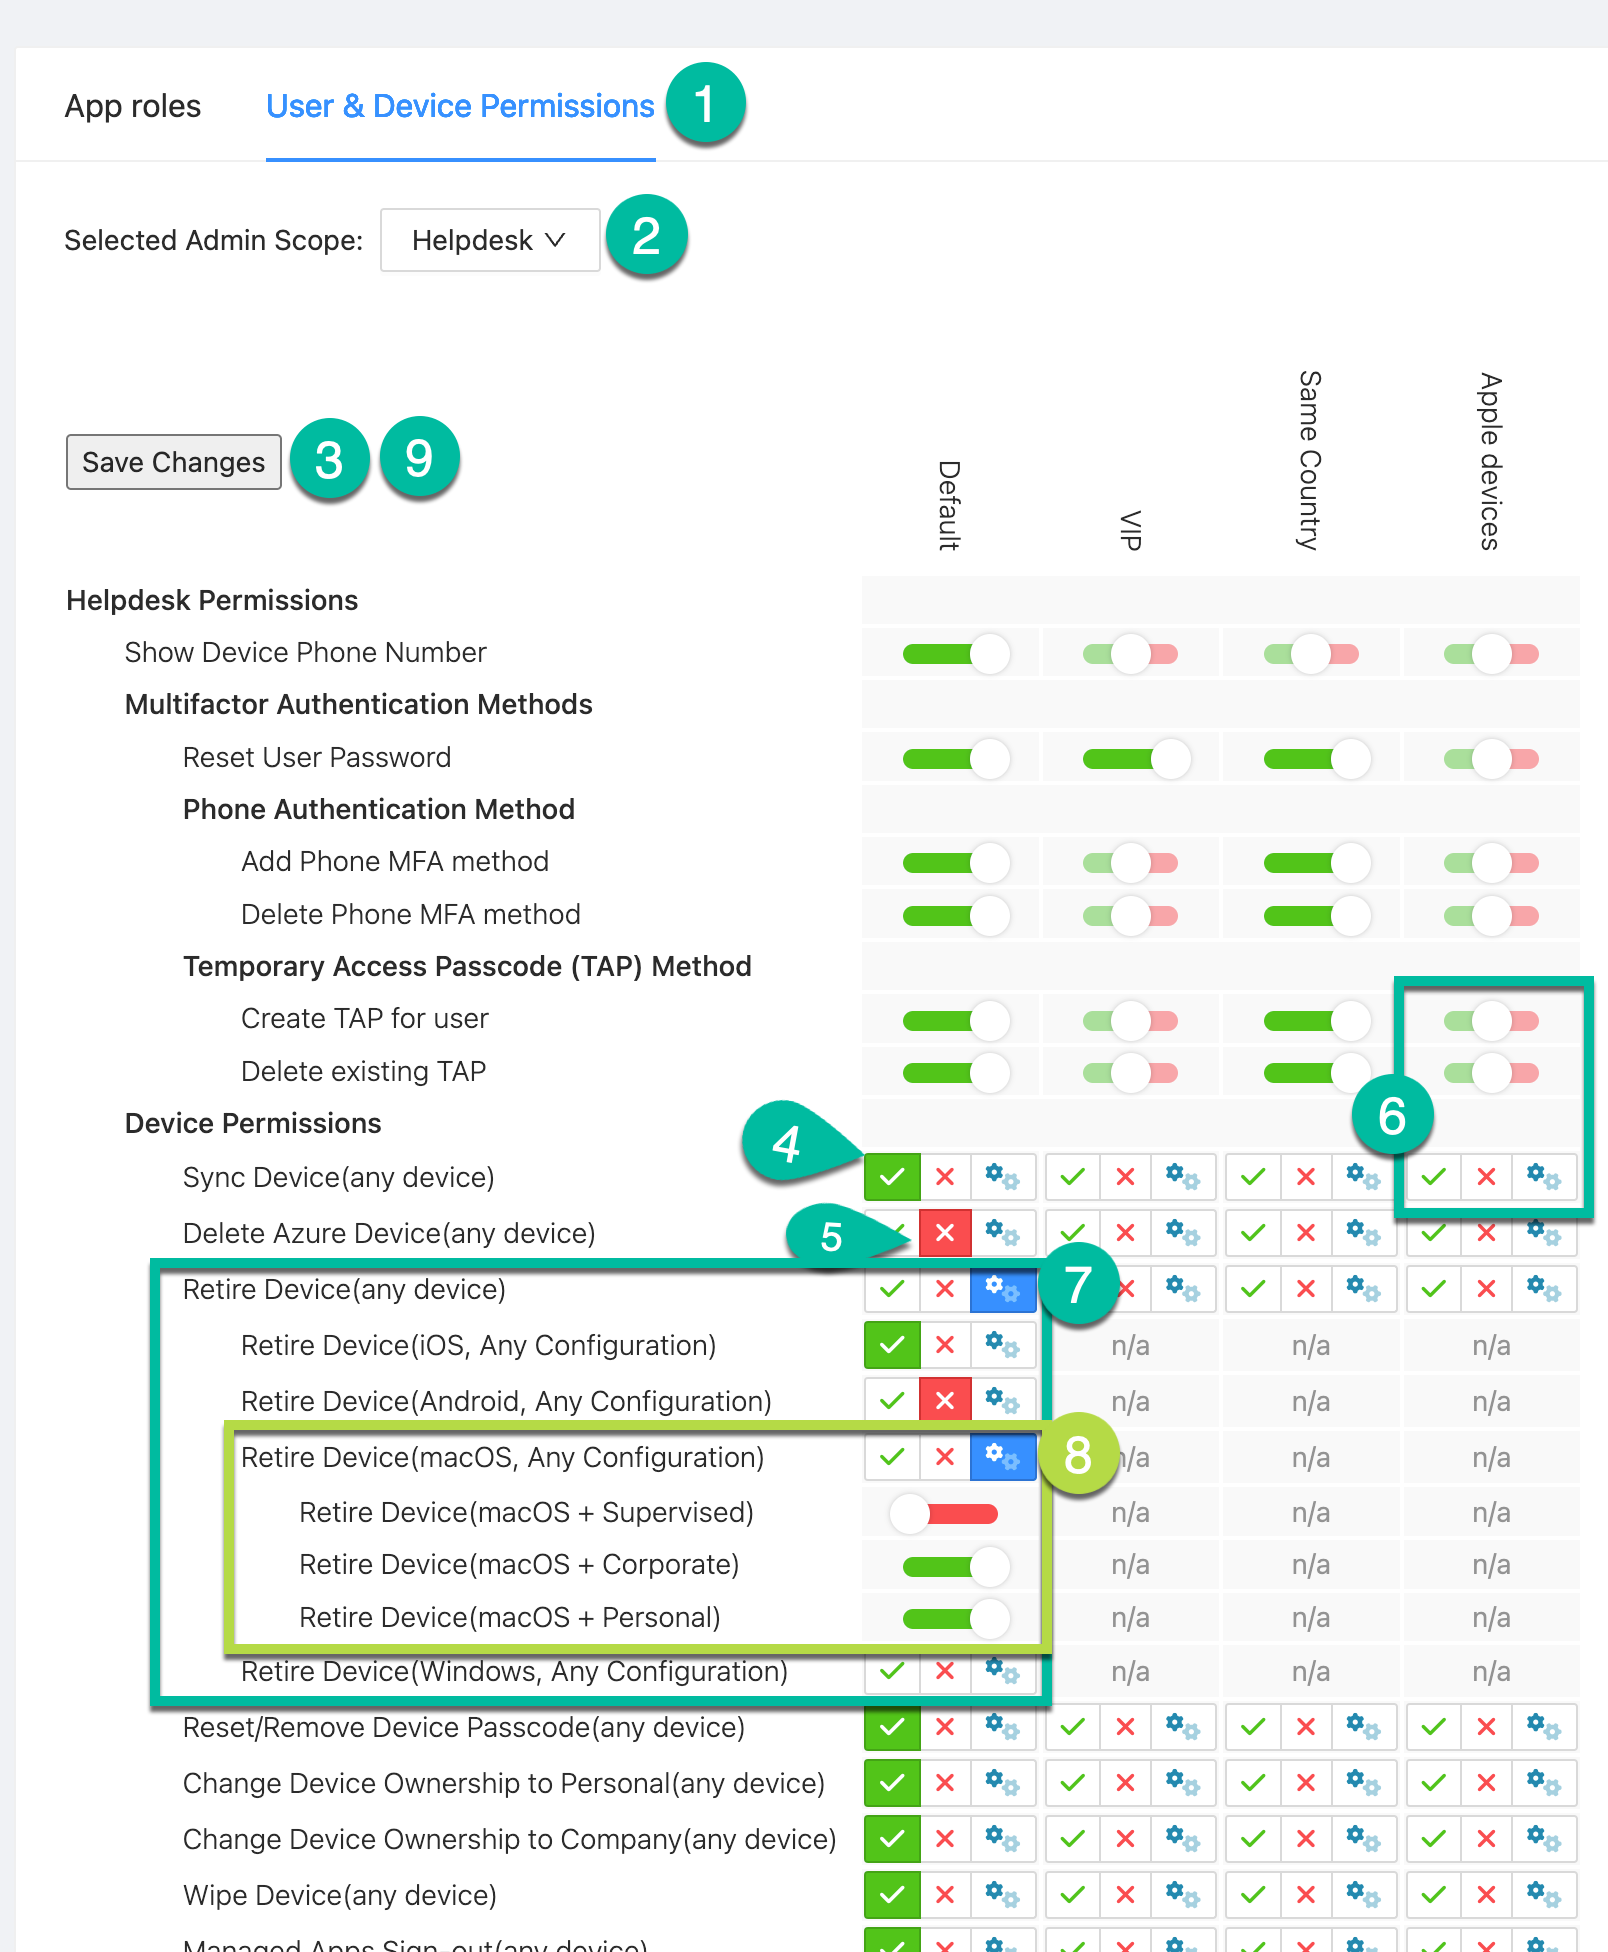
Click on the slider to assign or un-assign the permission. The vertical axis lists all configured Admin Sopes. The horizontal access lists all App Roles

  1. A red slider means that the permission is un-assigned.

    (image.pngor image.png)


  2. A green slider means that the permission is assigned.

    (image.png or image.png)

  3. A slider is also considered un-assigned/unset if the slider is centered.

    (image.png or image.png)

Click on Save Changes to persist your modifications.

User & Device Permissions

User & Device Permissions follow the same principle as the App roles but provide additional granularity.

image.png

  1. Switch to the User & Device Permissions tab
  2. Select the Admin Scope you want to view/edit the permission assignment
  3. Use the Edit button to switch to the editing view
  4. A green slider means that the permission is assigned.

    (image.png or image.png)

  5. A red slider means that the permission is un-assigned.

    (image.pngor image.png)

  6. A slider is also considered un-assigned/unset if the slider is centered.

    (image.png or image.png)

  7. Device actions have an additional Custom-setting that allows for additional granularity. The base setting allows the assignment and un-assignment of the device action for "(any device)". Selecting Custom will enable 3 extra rows. There, you can assign/un-assign the permission based on the device's operating system (e.g. Allow retirement for iOS devices but prohibit the retirement of Android devices) for a given Admin Scope and End User Scope.
  8. When using the Custom setting in a granular setting (like "MacOS, Any Configuration"), you can assign permissions even more granular based on the device's configuration. The three options are Supervised, corporate-owned devices, and personal-owned devices.
  9. Use the Save Changes button to persist your modifications.